Inforniamo bontà - Pain d'Epi al Farro or Spelt Pain d'Epi

Scroll Down for English Version
Anche il mese di novembre sta correndo via e mi ritrovo sempre a rincorrere il tempo che non basta mai. Tempo per cucinare cose nuove ultimamente non ne ho avuto, ma non ho rinunciato a sfornare qualche pagnotta per accompagnare degli ottimi passati di verdura. Cene semplici, ricche di sapori poco complicati eppure così buoni. Per quanto riguarda il pane, stavolta ho usato della farina di farro e una tecnica che adoro perché velocissima. Tutto è cominciato con un libro che ho comprato circa 8 anni fa in cui si parlava della possibilità di fare il pane in casa senza bisogno di impastarlo.
Naturalmente sono stata subito attratta da questa tecnica veloce. Non che abbia qualcosa contro l'impastare a mano s'intende, può essere terapeutico e rilassante, ma volete mettere preparare l'impasto in pochi minuti e potersi dedicare ad altro?
Da quando ho messo le mani su questo libro, e sui successivi pubblicati dagli stessi autori, il mio rapporto con la panificazione è notevolmente migliorato.

Mi piace preparare cibo che non richiede troppa lavorazione, non ho la pazienza né la tenacia per impelagarmi in preparazioni complicate per cui questa tecnica per la produzione di pani, pizze e focacce mi ha subito stregata. Il segreto sta nella alta idratazione dell'impasto che permette di ottenere risultati strepitosi. Volendo si può usare pochissimo levito con lievitazioni che vanno dalle 2 ore fino a una notte. L'impasto si conserva bene in frigo anche per una settimana e può essere perfino congelato, ma la velocità con cui viene preparato rende abbastanza inutile quest'ultimo espediente.
Di solito preparo un impasto base mescolando le farine che ho in casa e insieme ad acqua, lievito e sale ottengo il mio impasto appiccicoso che dopo la lievitazione uso per formare varie pezzature di pane.
Il preferito di Andrea è il pain d'epi, una specie di baguette formata da tanti piccoli paninetti attaccati l'uno all'altro. Questi panini hanno una bella mollica morbida e corposa e la crosta croccante. Se volete potete formare una ghirlanda, partendo da una pagnotta rotonda nella quale praticherete un foro che allargherete fino a ottenere una ruota di impasto che taglierete come il pain d'epi.


Potrete poi decorarla con un nastro come ho fatto io e avrete un pane magnifico per la vostra tavola delle feste.


Ma vediamo come si fa questo pane. Stavolta ho scelto di farlo con della farina di farro e farina di grano tipo 2 per un risultato più rustico e ricco di sapore.
- 375 g di farina tipo 2
- 150 g di farina di farro
- 7 g di lievito di birra disidratato (1 bustina)
- 2 cucchiaini e mezzo di sale marino fine
- 380 ml di acqua tiepida
- farina di mais, q.b.
Mescolate l'acqua e il lievito in una ciotola capiente poi aggiungete le farine e il sale e con l'aiuto di un cucchiaio di legno mescolate bene in modo da far assorbire tutta la farina. Dovrete ottenere un impasto colloso e non troppo liscio.

Coprite la ciotola con un coperchio e fate lievitare per 2 ore a temperatura ambiente o nel forno spento con la luce accesa.
Passato questo tempo l'impasto è pronto per essere usato, ma se volete che sia più malleabile mettetelo in frigo per almeno un'ora.
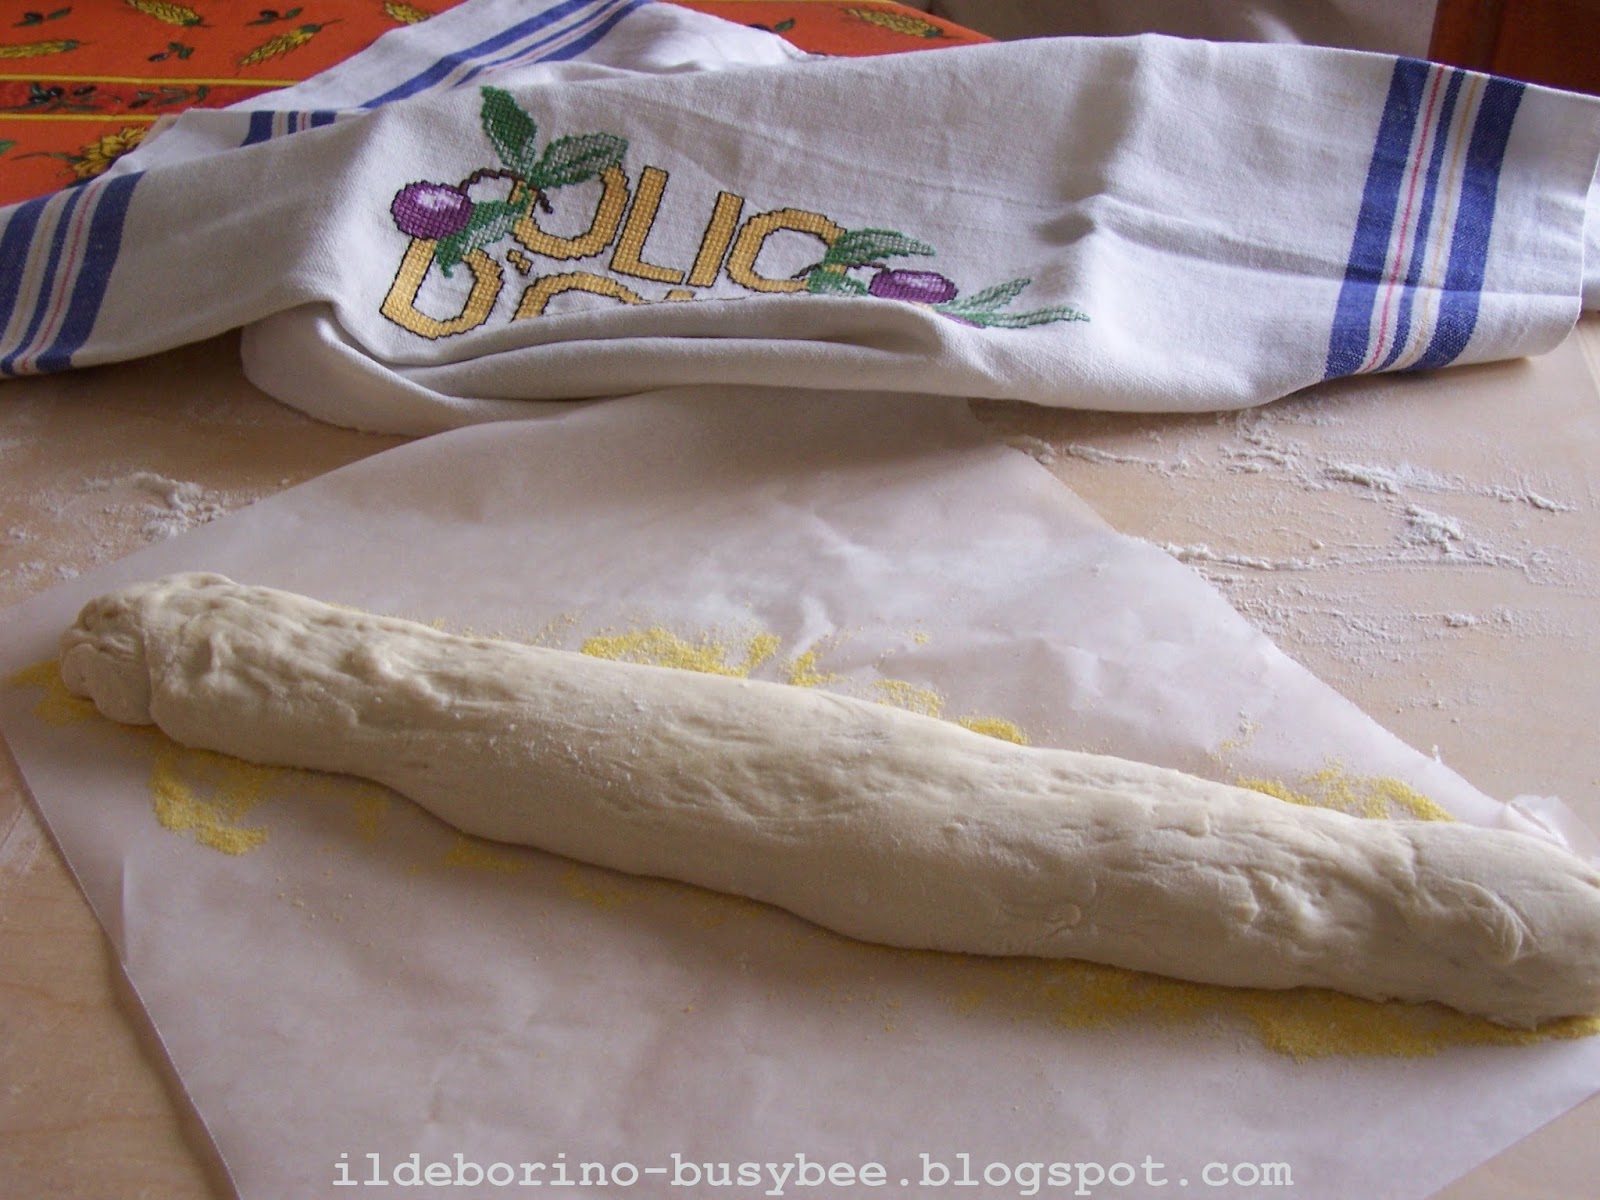
Una volta pronti per fare il pane spolverate il piano di lavoro con abbondante farina, cospargete di farina anche la superficie dell'impasto e prelevatene circa metà tagliandolo con le mani o con l'aiuto di un paio di forbici.
Stendete l'impasto con le mani poi unite le estremità al centro in modo da formare una palla. Stendete di nuovo l'impasto, con le mani e infarinando abbondantemente e formate un rettangolo. Piegate il lembo superiore verso il basso e quello inferiore verso l'alto e poi sigillateli. Date la forma di un salsicciotto all'impasto e mettetelo a lievitare su un foglio di carta da forno spolverizzato con abbondante farina di mais. Copritelo con un telo da cucina pulito e lasciate lievitare per 20 minuti circa.
 |
| La superficie dovrebbe essere più uniforme, senza "strappi"/The surface of the dough should be smooth, without "tears" |
Scaldate il forno alla massima temperatura. Fate scaldare anche la vostra pietra refrattaria o la leccarda del forno e una piccola teglia posizionata sul forno del forno. Quando il forno avrà raggiunto la massima temperatura, abbassatelo a 220°C con l'opzione ventilata, se l'avete.
Infarinate la superficie del vostro filoncino di pane poi, con un paio di forbici, praticate dei tagli a 45°, ma senza tagliare fino in fondo, poi spostate i pezzi tagliati alternativamente da una parte e poi dall'altra.
 |
| Foto di repertorio del mio primo tentativo con il pain d'epi, la pubblico allo scopo di fare vedere come posizionare l'impasto una volta tagliato. My first ever attempt to pain d'epi, many years ago, I used this image to show you the way you should arrange the dough once cut. |
Fate cuocere per circa 25-30 minuti fino a che il pane sarà ben dorato e fermo al tatto.
Fate freddare su una griglia prima di servirlo.
Questo pane è ottimo consumato in giornata, se avanza è ottimo anche il giorno dopo, magari scaldato, volendo anche in padella.
English Version
November is coming to an end, and I always find myself running out of time. I haven’t had time to cook new stuff lately, but I haven’t given up on baking amazing bread to serve with excellent vegetable soups. Simple dinners, yet so rich in taste. As for the bread, this time I used spelt flour and a technique I love because it's quick and easy. It all started with a book I bought about eight years ago. It is about making bread at home with the no-knead technique.
Of course I was immediately attracted to it. Not that I have anything against kneading by hand, of course it can be therapeutic and relaxing, but is there anything better than a few minutes preparation for the dough and then using your time to do something else while the dough is proving?
Since I got my hands on this book, and the others published by the same authors, my relationship with baking has greatly improved. I like cooking food that doesn’t involve too much prepping, I don’t have the patience nor the tenacity to get involved in complicated preparations so this technique for making bread, pizza and focaccia is really my thing. The secret lies in the high hydration of the dough that gives great results. If you want you can use very little yeast increasing the proving time that ranges from two hours up to overnight. The dough can be stored in the fridge for a week and can even be frozen.
I usually make a basic dough by mixing any flour I’ve got in my pantry with water, yeast and salt and get my sticky dough, then after rising I use it to form different bread loaves.
Andrea’s favourite bread is pain d'epi, a kind of baguette made up of many small rolls stuck to one another. These little rolls have a nice soft crumb and a crisp crust. If you want you can shape it like a wreath, starting from a round loaf at the centre of which you make a hole stretching it until you have a wheel to be cut like the traditional pain d'epi. You can then decorate it with a ribbon like I did and you will have a wonderful bread for your festive gatherings.
But let's see how I made this bread.
This time I used wheat flour type 2, and spelt flour for a more rustic and flavoursome result.
- 375 g flour type 2
- 150 g spelt flour
- 7 g dried yeast (1 sachet)
- 2 ½ teaspoons of fine sea salt
- 380 ml warm water
- corn (polenta) flour, to dust the parchment paper
Stir the water and yeast in a large bowl then add the wheat, spelt flours and salt. Mix well, with the help of a wooden spoon, untill all the flour has been absorbed. You'll have a sticky and rough dough.
Cover the bowl with a lid and let rise for 2 hours at room temperature or in the turned-off oven with the light on.
After this first proving the dough is ready to be used, but if you want it to be more pliable place it in the refrigerator for at least an hour.
When ready to bake sprinkle the work surface with plenty of flour, also sprinkle the dough in the bowl with flour, then cut off half of the dough with your hands or with the help of a pair of scissors.
Flatten the dough with your hands then join the sides towards the center to form a ball. Flatten again the dough liberally sprinkling with flours and form a rectangle. Fold the top flap down and the bottom flat upwards and then seal. Give the dough the shape of a sausage and arrange on a piece of parchment paper sprinkled with plenty of corn flour. Cover with a clean kitchen towel and let rise for about 20 minutes.
Heat the oven to the maximum temperature. You need to put your baking stone or a baking tray in the oven and an additional small tray at the bottom of the oven. When the oven has reached the maximum temperature, lower it to 220°C fan.
Flour the surface of your dough then, with a pair of scissors, cut at a 45° angle, without cutting all the way then moved the pieces alternately to one side and then to the other. Pour a cup of boiling water into the small tray at the bottom of the oven.
Take out the stone or the baking tray from the oven and slide on it the dough with baking paper.
Bake for about 25-30 minutes until the bread is golden brown and firm to the touch.
Let cool on a wire rack before serving.
This bread is great eaten on the day of baking, if you have some leftover, try heating it in a pan over the stove, it will be great.


Questo metodo di impasto è davvero interessante ed il risultato divino, grazie x la condivisione!
RispondiEliminaConsuelo, te che sei la regina della pasta madre, potresti sperimentare e vedere cosa succede utilizzando quella al posto del lievito... ❤
EliminaIo faccio schifo di solito nel fare il pane o tutte le cose che richiedono un'impastatura e una lievitazione, quindi questo metodo mi incuriosisce non poco! Segnato nelle cose "da fare assolutamentissimamente"!!
RispondiEliminaProvalo, vedrai che sarà un super successo!❤
Elimina